APIs are essential to modern software, allowing applications to communicate and exchange data. As we use APIs more, making sure they are reliable, fast, and secure is very important. Choosing the right API testing tool can significantly help your testing strategy.
This guide is a practical resource on using Postman as a functional API testing tool. Whether you’re experienced with APIs or just starting out, this blog will give you the knowledge and practical skills to use Postman’s powerful features for thorough API testing.
Introduction to API Testing
Before jumping into Postman, let’s first establish a solid understanding of what API testing is. At its core, API testing ensures the functionality, reliability, performance, and security of an Application Programming Interface, or API. Unlike UI testing, which focuses on the user interface, API testing directly examines the underlying communication layer between the applications themselves by sending multiple requests to API endpoints and validating the responses.
By concentrating on the core logic and data exchange layer, developers can practice API security testing and enable early issue detection and resolution within the development lifecycle. This approach prevents regressions and guarantees seamless integration among software components.
Why is API Testing Important?
Having developers perform API testing is crucial for creating solid and reliable apps. Testing APIs in a dedicated testing environment lets developers find and fix bugs early, minimizing potential issues later on. This method enhances test coverage, addressing more scenarios and edge cases than UI tests.
API tests enable faster development cycles and quicker feedback, speeding up release times. This testing lowers costs, enhances security by finding vulnerabilities, and boosts software quality, improving system performance. API testing is key to the software development lifecycle (SDLC), ensuring APIs meet functionality, reliability, and security requirements.
API testing also unlocks an understanding of how your API handles a wide variety of fail states and successful interactions. Load testing reveals how your API handles increased traffic. Contract testing can help ensure that systems are doing what they should be doing, regardless of traffic volume or intent. Effective testing uncovers security vulnerabilities, highlighting potential issues at scale, including external service validation and early detection. The benefits are extensive, from regression tests and beyond!
Effective API testing requires a deep understanding of the API’s purpose, expected behavior, and underlying technologies. By combining manual testing and test automation, developers can build robust, reliable, and secure APIs that seamlessly integrate with other software components at scale.
Getting Started with Postman
Postman is a versatile API platform that streamlines API lifecycle management with tools for building, testing, documenting, and sharing. Its ease of use and extensive capabilities make it a favorite among developers for various use cases and deployments.
Here’s how to get started:
Download and Installation
- Visit the official Postman website to download the appropriate version for your operating system, be it Windows, macOS, or Linux.
- Follow the on-screen instructions to install Postman on your machine.
Creating a Postman Account
Using Postman without an account is possible, but creating one offers extra features such as workspace syncing, team collaboration, and access to the Postman API Network. Simply follow the prompts to create an account with accurate contact details for verification.
After account creation, you can start using the application.
Exploring the Postman Interface
Before using Postman, familiarize yourself with the key components in the Postman interface:
- Workspace: This is the main area where you organize your API requests and collections.
- Sidebar: The sidebar provides access to workspaces, history, collections, and APIs.
- Request Builder: This is the central area where you compose your API requests, including the URL, method, headers, and body.
- Response Viewer: This area displays the API response, including the status code, headers, and body.
Organizing and Running API Tests in Postman
Postman offers robust features to organize and run your API testing process efficiently.
Let’s explore how to structure and write tests to maximize effectiveness.
Collections
Collections allow you to organize related API requests into folders and manage their execution sequence. Think of collections as test suites for your APIs – by grouping related requests, you can easily run tests for specific application functionalities or modules.
To further organize your tests, create folders within collections. This allows for a hierarchical structure, enabling you to categorize requests by functionality, endpoint, or any other relevant criteria.
Variables
Postman supports environment variables, global variables, and collection variables. Using variables makes your tests more flexible and maintainable, unlocking more observability and eliminating testing rigidity that might generate false data or make testing difficult at scale. For instance, you can store base URLs, API keys, and authentication tokens as variables, allowing you to easily switch between different environments (e.g., development, staging, production) without modifying your requests.
Collection Runner
The Collection Runner is a powerful tool for executing a series of API requests in a defined sequence. This facilitates automated API testing, enabling single-click test suite execution, running tests across collections or specific folders, customizable iterations for test versioning, and setting request delays. The Collection Runner provides detailed test results for each API request, including pass/fail status, response times, and error messages.
Data-Driven Testing with CSV and JSON Files
Postman allows you to import data from CSV or JSON files for data-driven testing, which allows you to run the same requests with different sets of data, increasing test coverage and efficiency. This allows you to test various scenarios and edge cases without manually modifying each request.
You can create well-structured, maintainable, and comprehensive API tests in Postman using these features. This structured approach improves the efficiency of your API testing process and enhances the reliability and accuracy of your API test results.
Writing Effective Test Scripts in Postman
Writing tests in JavaScript allows for a comprehensive suite that rigorously tests your API’s functionality. The key to this process is to understand the pm object – through the pm object, you can access request details like URLs, headers, and body content and retrieve response information such as status codes, headers, and the response body itself.
To structure your tests effectively, you can leverage the pm.test() function. This function will let you define individual test cases with descriptive names, making your test output clear and informative. Within each test case, employ the ChaiJS BDD syntax for expressive assertions, which will ensure that your code is readable and easy to understand. For instance, you can easily assert that the response status code is 200 using pm.response.to.have.status(200), or that the response body contains specific data using pm.expect(jsonData.name).to.equal("John Doe").
When dealing with asynchronous operations, use pm.sendRequest() function and embrace promises or async/await for clean and efficient code handling. Your tests can become more adaptable by storing and reusing values across requests with dynamic variables. This is particularly valuable for elements like authentication tokens, base URLs, and test data, which might change across different environments or test scenarios.
You can also combine Postman’s data import functionality within your scripts to run the same tests against various datasets, which will significantly expand the coverage of your test API. To streamline this workflow and promote consistency, you can also create reusable functions or snippets for common test scenarios, minimizing code duplication and ensuring uniformity across your tests. By employing these methods, you can transform your Postman tests into detailed evaluations that not only validate but also significantly improve the functionality, reliability, and overall API performance.
Advanced Postman Features for API Testing Process
To take this a step further, you can use a series of advanced offerings provided by Postman to unlock additional testing options.
Pre-request Scripts
Pre-request scripts in Postman enable you to execute JavaScript code before a request is sent. This capability allows for dynamic request modification, data setup, and other actions.
For instance, you can generate timestamps or unique IDs to include in your requests, ensuring that each request is distinct and trackable throughout the testing environment. You can take this a step further and set dynamic headers based on environment variables, allowing you to switch these tests seamlessly between different testing environments.
Pre-request scripts also allow you to fetch data from external sources and incorporate it into your request. This can help formulate tests that would require third party data sources or other workflows which would be called as part of the pre-request service method rather than as a result of a specific request.
Post-request Scripts
Post-request scripts in Postman are executed after receiving a response from the API. Primarily for writing test assertions, their special attributes extend their utility beyond basic validation.
Specifically, these scripts allow you to extract data from the response, which can then be used in subsequent requests, enabling dynamic workflows. You can also store data in environment or global variables for later use, facilitating data persistence across requests, or port data from request to request in a chain, allowing for very complex request flows that might utilize multiple internal pathways. To take this a step further, post-request scripts can be used to trigger entire new workflows, or even send notifications based on the response, allowing you to test notification systems or automated workflows.
Working with Cookies
Cookies are small text files that websites store on a user’s computer to remember information about them, such as login details or preferences. These are often very important in web application interactions, and as such, should be included in certain testing approaches.
Postman provides robust tools for managing cookies, allowing you to simulate various user scenarios and thoroughly test how your API would interact with them. You can easily inspect the cookies exchanged between your requests and the API, giving you valuable insight into session management and user tracking.
Furthermore, Postman allows you to modify or even delete cookies, enabling you to test how your API behaves under different cookie conditions, such as expired sessions or altered user preferences. This granular control over cookies ensures comprehensive testing of how your API handles cookies.
Authorization Helpers
Postman simplifies working with various authentication methods, providing built-in helpers to streamline the process of securing your API requests. Whether you’re using basic authentication with username and password credentials, API keys for simpler authorization, OAuth 1.0/2.0 for delegated access, or bearer tokens for token-based authentication, Postman has you covered. These built-in helpers assist in generating and managing the necessary authorization headers, making it easier to test APIs that require secure access.
This dramatically simplifies the often complex process of authenticating requests, allowing you to focus on testing the core API development.
The Collection Runner and Newman
The Collection Runner unlocks advanced API testing in Postman. It allows you to execute a collection of requests sequentially, using data files (CSV or JSON) to test various scenarios with different inputs. You can even schedule collections to run at specific intervals, automatically monitoring your APIs for regressions or performance issues over time.
For more advanced automation, Newman, Postman’s command-line interface, lets you run collections from your terminal or integrate them into your CI/CD pipeline. This provides greater flexibility, allowing you to customize collection runs, generate reports in various formats, and easily integrate with other tools in your development workflow.
Integrating with CI/CD
To achieve continuous testing and ensure your APIs are always thoroughly vetted, integrate your Postman tests directly into your CI/CD pipeline. This automates testing, catching any issues early with every code change. Postman readily integrates with popular CI/CD tools like Jenkins, Travis CI, and CircleCI, making incorporating API testing into your existing workflows easy.
By automating your API tests with Postman, you can create a robust testing framework that helps you confidently deliver high-quality APIs.
Introductory Postman Demo
Below is an example of a simple Node.js API. This API allows users to perform basic CRUD operations that will allow us to demonstrate the basics of testing an API with Postman.
To run this app, first, ensure you have Node.js installed. Then, create a new directory for your project, ours is named “postman-testing-api-example”, and initialize the directory by running:
npm initYou’ll also need to install Express, a popular web framework for Node.js, and a few other dependencies we will use in the project. You’ll do this by running the following npm command:
npm install express sqlite3Now, in the root of the project we just created, create a file named server.js and add the following code:
const express = require('express');
const app = express();
const port = 3000;
const sqlite3 = require('sqlite3').verbose();
app.use(express.json());

// Initialize the database
const db = new sqlite3.Database(':memory:');
db.serialize(() => {
  db.run(`CREATE TABLE IF NOT EXISTS users (
    id INTEGER PRIMARY KEY AUTOINCREMENT,
    name TEXT NOT NULL
  )`);
  // Insert initial sample data
  db.run(`INSERT INTO users (name) VALUES ('Alice'), ('Bob')`);
});
// GET /users - Retrieve all users
app.get('/users', (req, res) => {
  db.all('SELECT * FROM users', [], (err, rows) => {
    if (err) {
      res.status(500).json({ error: err.message });
      return;
    }
    res.json(rows);
  });
});
// GET /users/:id - Retrieve a user by ID
app.get('/users/:id', (req, res) => {
  const id = parseInt(req.params.id);
  db.get('SELECT * FROM users WHERE id = ?', [id], (err, row) => {
    if (err) {
      res.status(500).json({ error: err.message });
      return;
    }
    if (!row) {
      res.status(404).send('User not found');
      return;
    }
    res.json(row);
  });
});
// POST /users - Create a new user
app.post('/users', (req, res) => {
  const { name } = req.body;
  if (!name) {
    res.status(400).json({ error: 'Name is required' });
    return;
  }
  db.run('INSERT INTO users (name) VALUES (?)', [name], function (err) {
    if (err) {
      res.status(500).json({ error: err.message });
      return;
    }
    res.status(201).json({ id: this.lastID, name });
  });
});
// PUT /users/:id - Update an existing user
app.put('/users/:id', (req, res) => {
  const id = parseInt(req.params.id);
  const { name } = req.body;
  if (!name) {
    res.status(400).json({ error: 'Name is required' });
    return;
  }
  db.run('UPDATE users SET name = ? WHERE id = ?', [name, id], function (err) {
    if (err) {
      res.status(500).json({ error: err.message });
      return;
    }
    if (this.changes === 0) {
      res.status(404).send('User not found');
      return;
    }
    res.json({ id, name });
  });
});
// DELETE /users/:id - Delete a user
app.delete('/users/:id', (req, res) => {
  const id = parseInt(req.params.id);
  db.run('DELETE FROM users WHERE id = ?', [id], function (err) {
    if (err) {
      res.status(500).json({ error: err.message });
      return;
    }
    if (this.changes === 0) {
      res.status(404).send('User not found');
      return;
    }
    res.status(204).send();
  });
});
// Start the server
app.listen(port, () => {
  console.log(`API server is running at http://localhost:${port}`);
});
Create a Web Server
Here’s a quick code breakdown demonstrating how to create a simple web server using Node.js, Express.js, and SQLite3. This code provides a REST API for accessing and modifying user information stored in an SQLite database, running in memory for simplicity and demonstration purposes. Here’s a detailed look at the key components and actions within the code:
- Initialization of Express App:
- The code begins with initializing an Express application (
const app = express();).
- The code begins with initializing an Express application (
- SQLite Database Setup:
- A SQLite database is initialized in memory (
const db = new sqlite3.Database(':memory:');), making it temporary and ideal for demonstrations without external database connections. - Inside
db.serialize(...), a table named users is created, and two example user records are inserted, setting up initial data.
- A SQLite database is initialized in memory (
- API Endpoint Definitions:
- Basic CRUD endpoints are created to demonstrate accessing the API from Postman.
- Server Initialization:
- Finally, the application listens to incoming requests on a specified port (
const PORT = 3000;), making the API accessible to clients. A console log message confirms the server’s successful launch.
- Finally, the application listens to incoming requests on a specified port (
Run the Code
Now that our code is complete, it’s time to run the application and bring up our API. To run your API, run the following command in a terminal targeting the root of your project:
node server.js
Now that the API is running on http://localhost:3000, the next steps will show you how to test your API using Postman.
Test the API
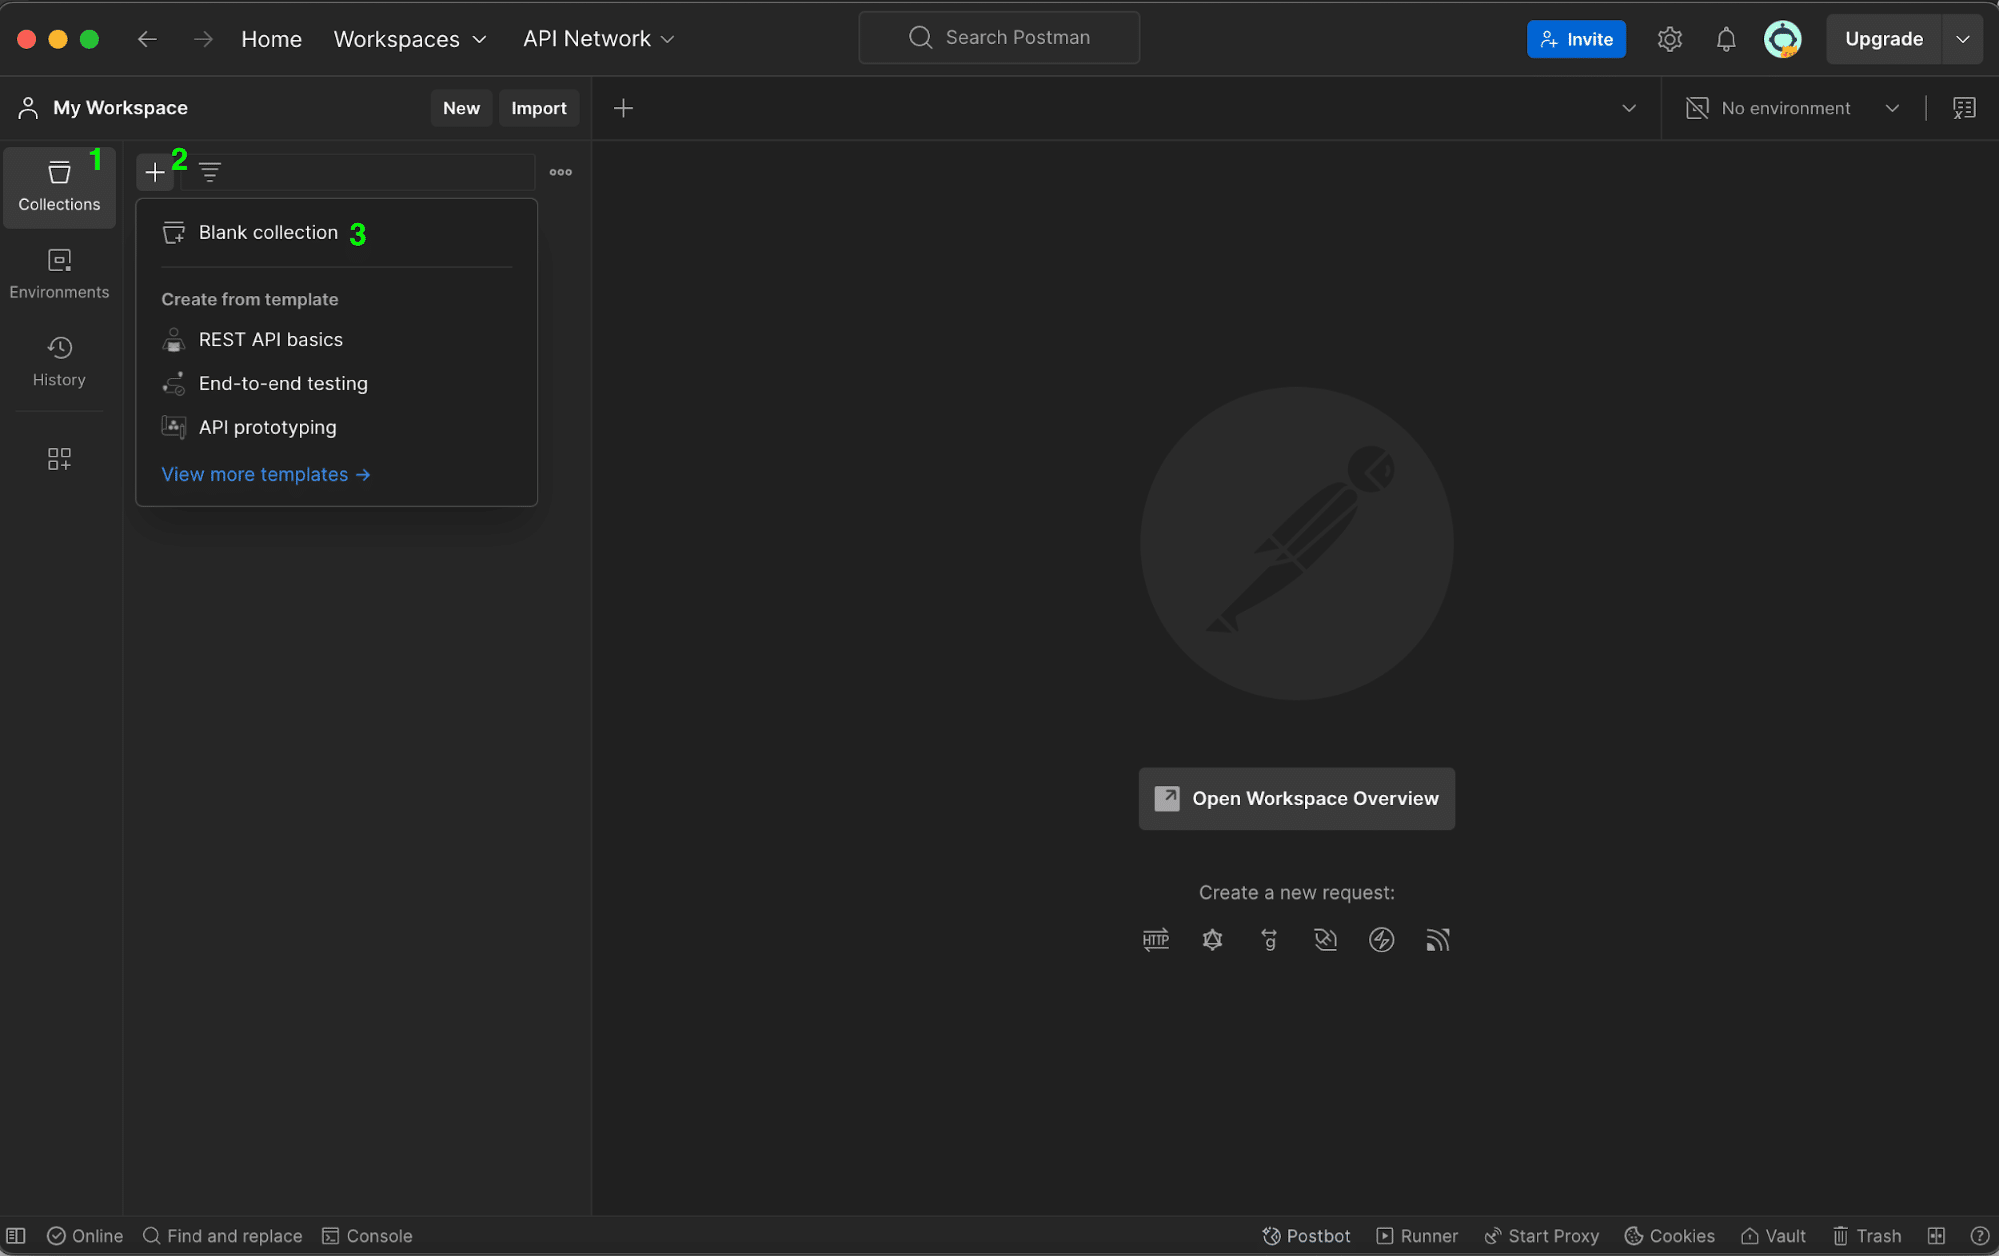
Before testing anything, we need to create a collection. Select the Collections tab on the left side, click the plus icon to add a new collection, and choose Blank Collection.
To test our API, launch Postman and create a new request. We’ll start with the GET /users endpoint. Click on the New button at the top of the Postman app, then select HTTP Request from the dropdown. This opens a new tab where we can configure our request.

By default, it is configured for a GET request, so all we need to do now is enter our URL in the URL field, enter http://localhost:3000/users. This is the endpoint we set up in our API to return the list of users. Click the blue Send button on the right side of the URL bar and Postman will send an HTTP GET request to your API’s /users endpoint and display the response in the lower half of the screen.

If all works well, you’ll see a JSON-formatted user list, similar to the above screenshot.
Next, let’s create a POST request, following the same steps as before but selecting POST from the dropdown. Use the same URL http://localhost:3000/users, but add a request body. Click the Body tab, select raw, choose JSON from the right dropdown, and enter your JSON payload.
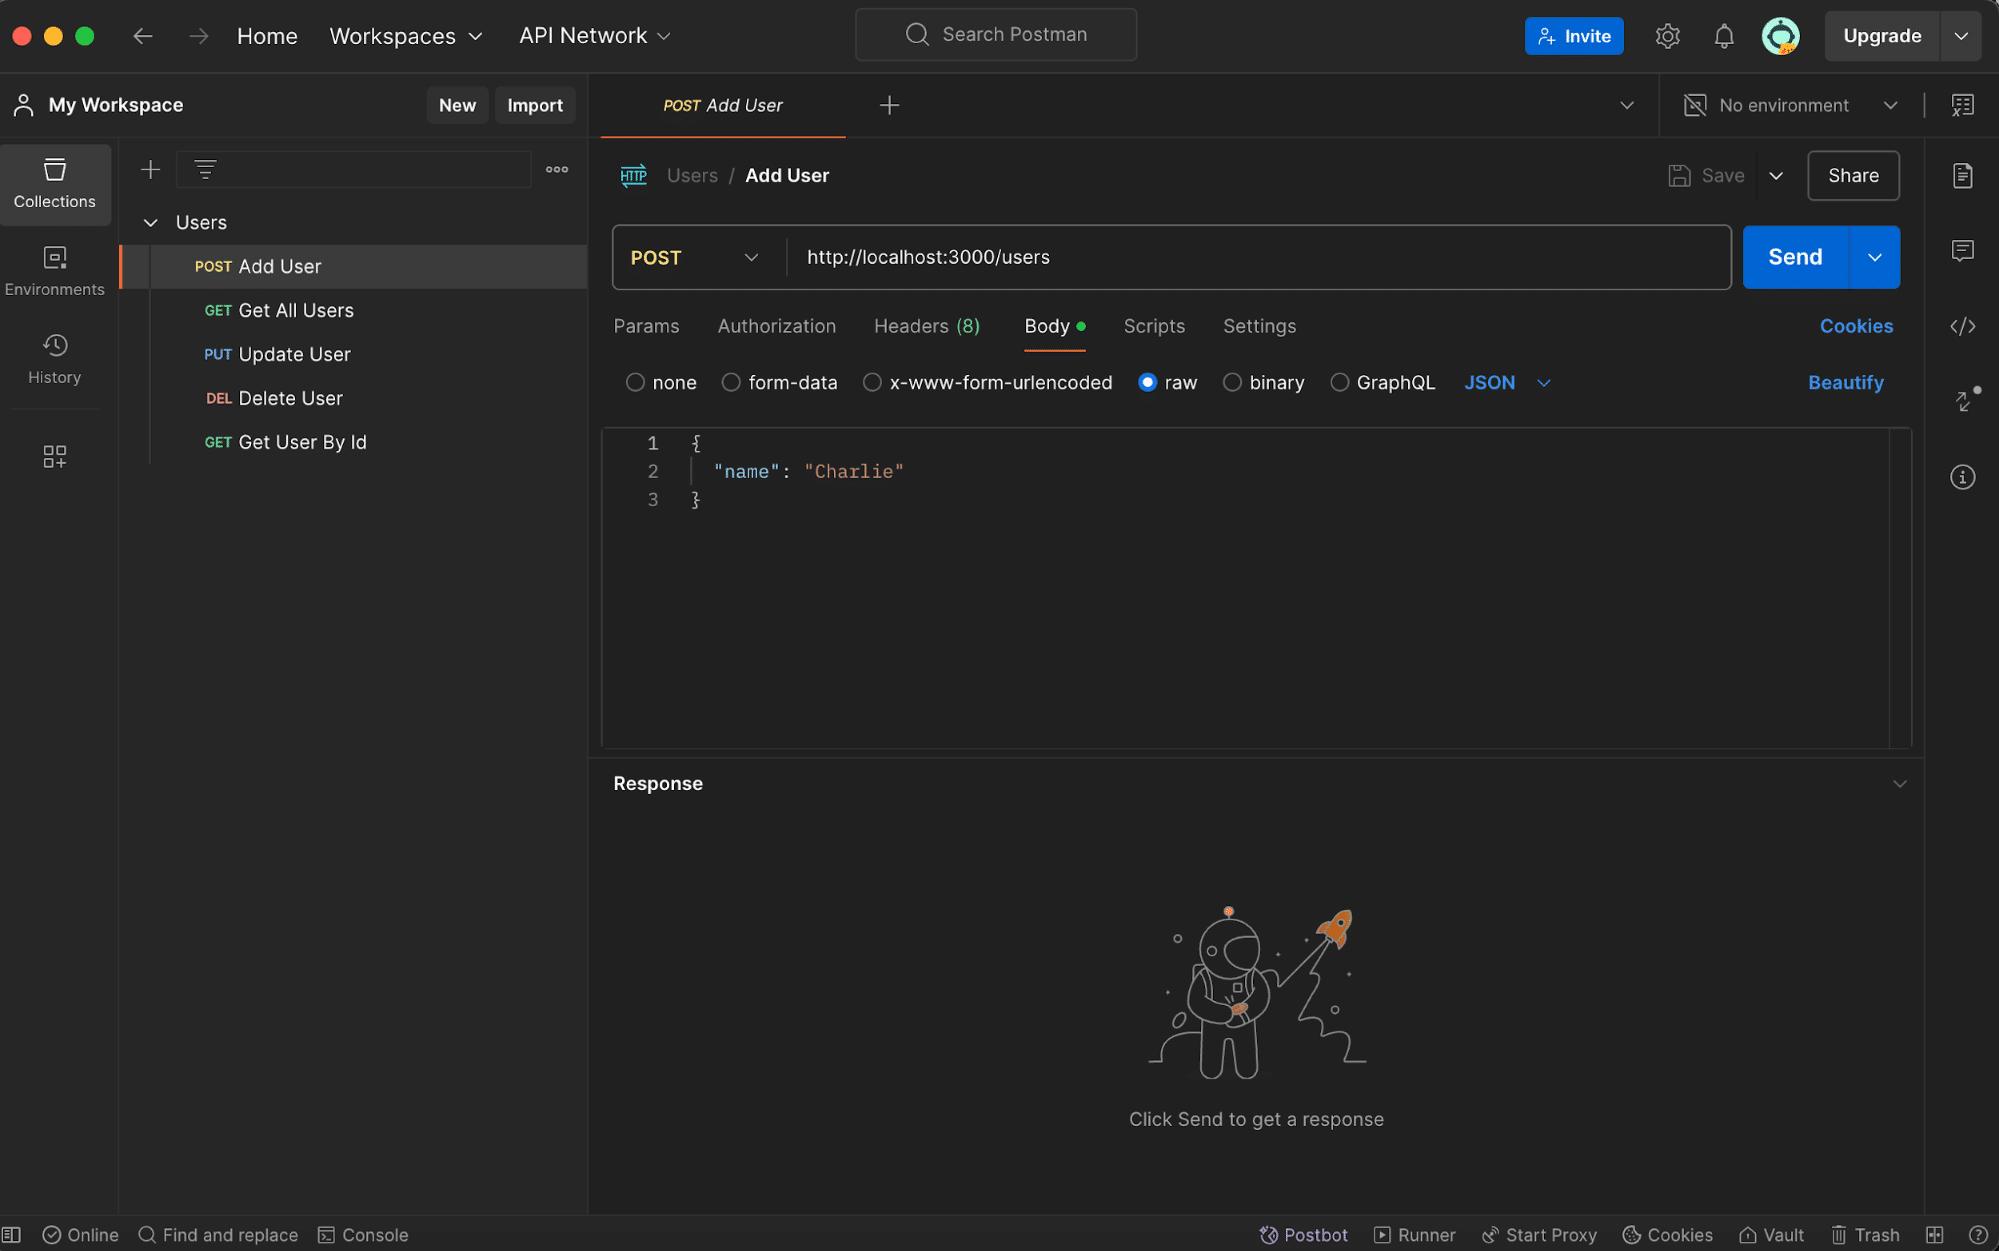
The remaining requests will be:
- GET http://localhost:3000/users/{{userId}}
- PUT http://localhost:3000/users/{{userId}}
- With a body of { “name”: “Charles” }
- DELETE http://localhost:3000/users/{{userId}}
After creating the requests, save them to the earlier collection using the Save button above the Send button.

Advanced Postman Functionalities
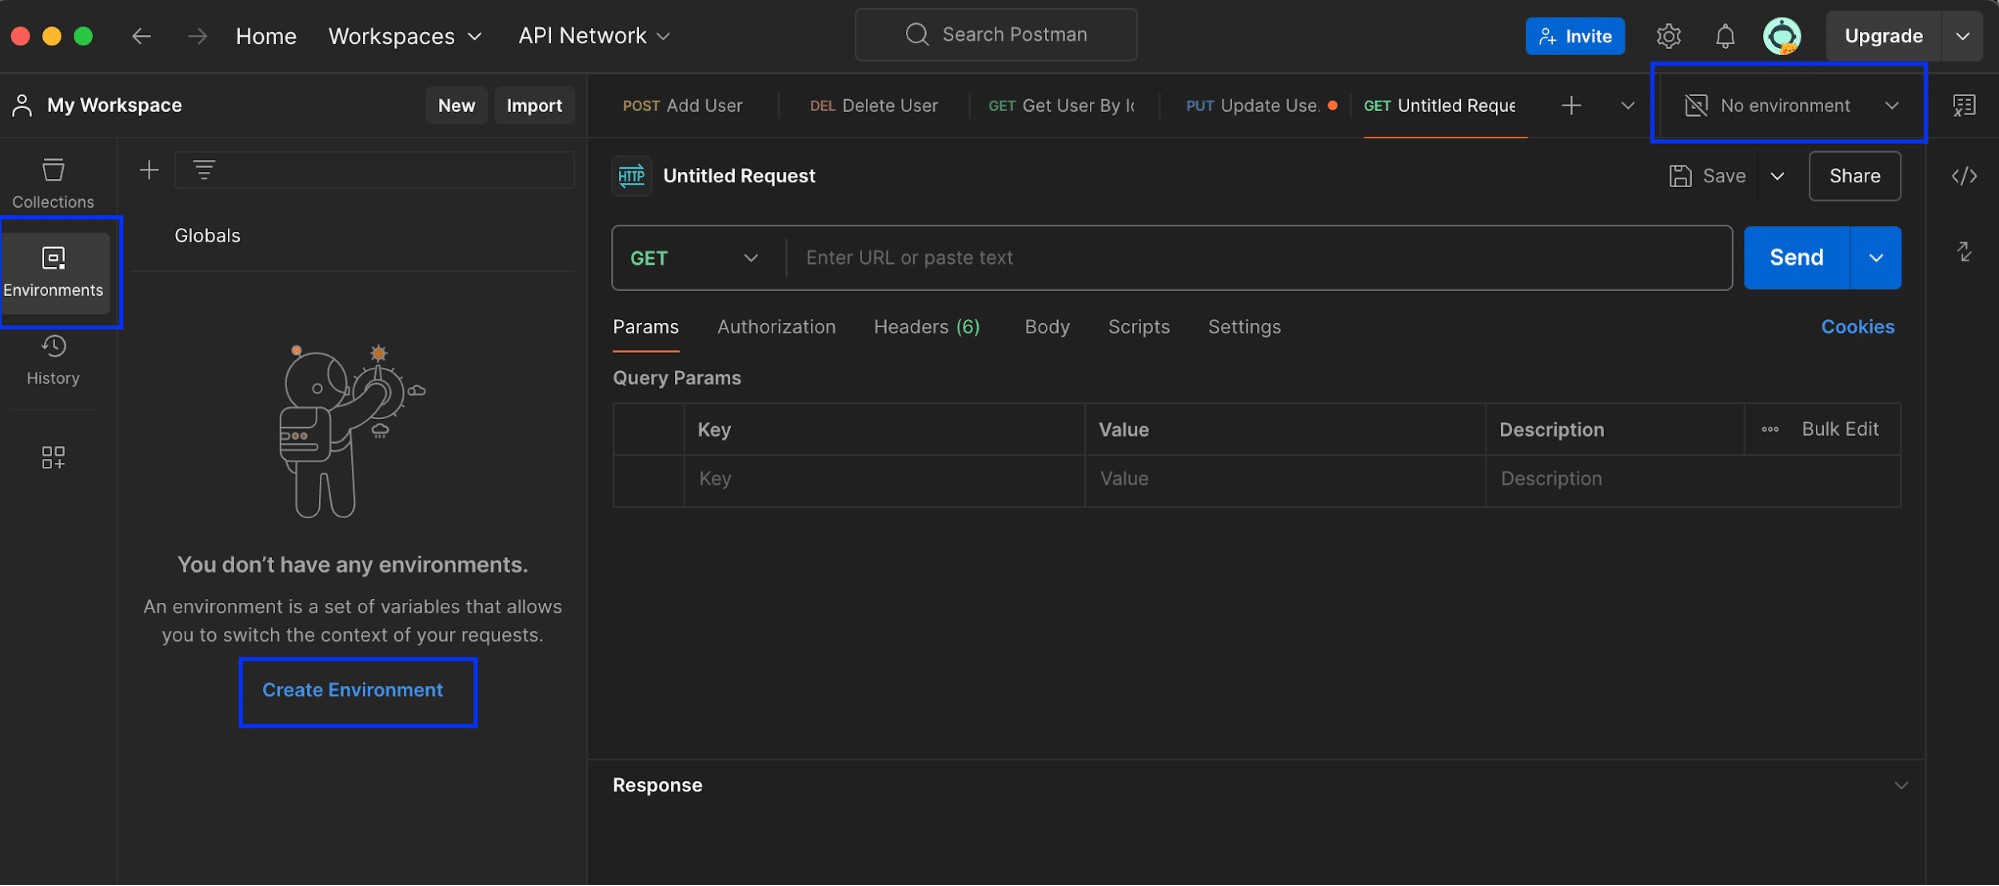
To access advanced features, create an environment by clicking the Environment tab on the left, then “Create Environment.” After creation, select it from the dropdown in the upper right corner.
With a collection and environment created, the next step is to go to the scripts tab of the POST method and add the following code. This code will set an environment variable to the Id of the added user.
let responseData = pm.response.json();
pm.environment.set("userId", responseData.id);
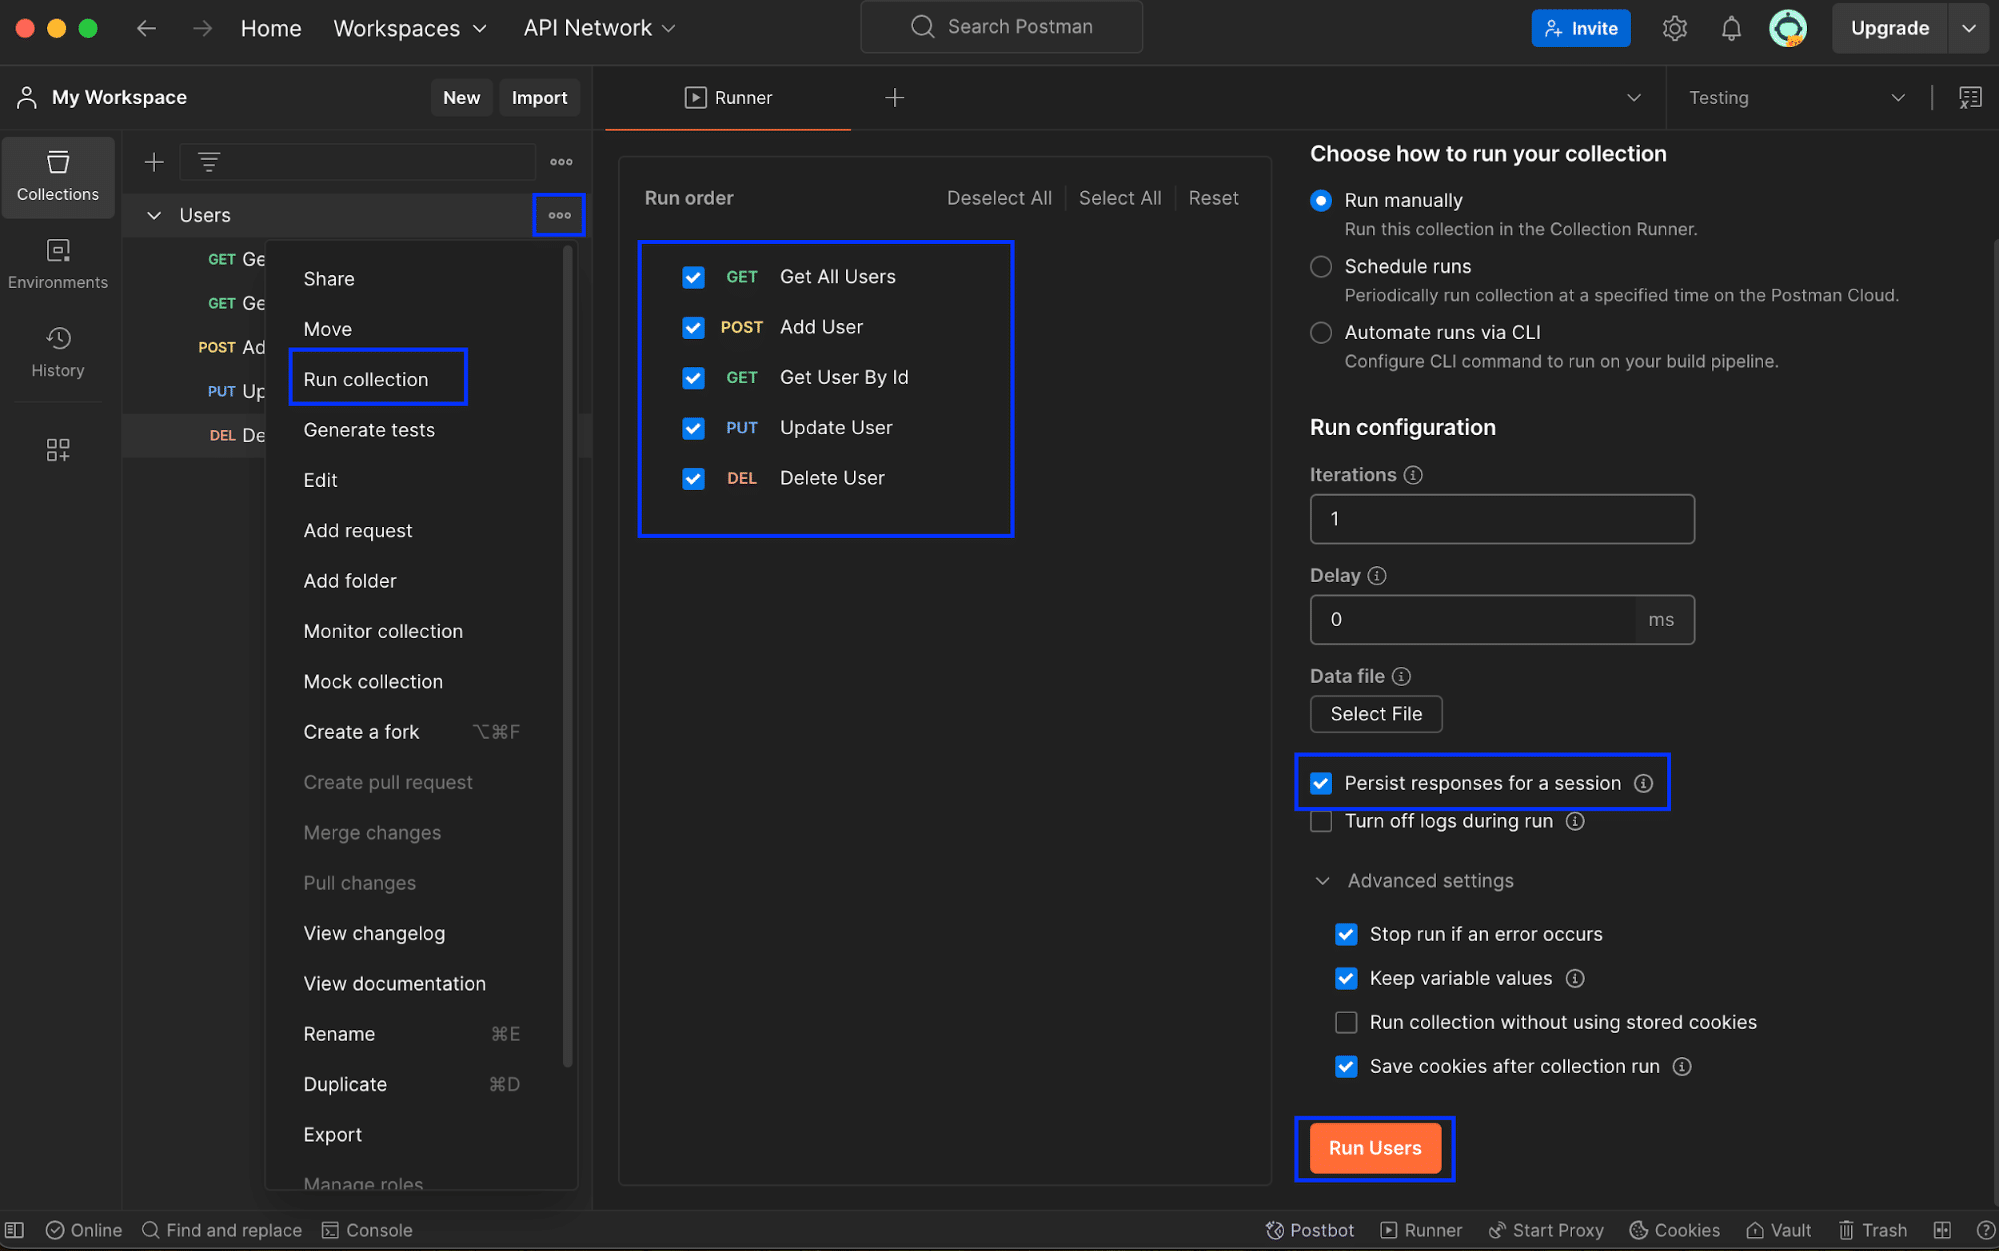
Click the three dots beside the collection name and choose “Run Collection.” You can arrange the requests as desired. To show a user being added, updated, and deleted in one run, order them as shown below. Check “Persist responses for a session” to view responses. Then, click “Run Users” to start.
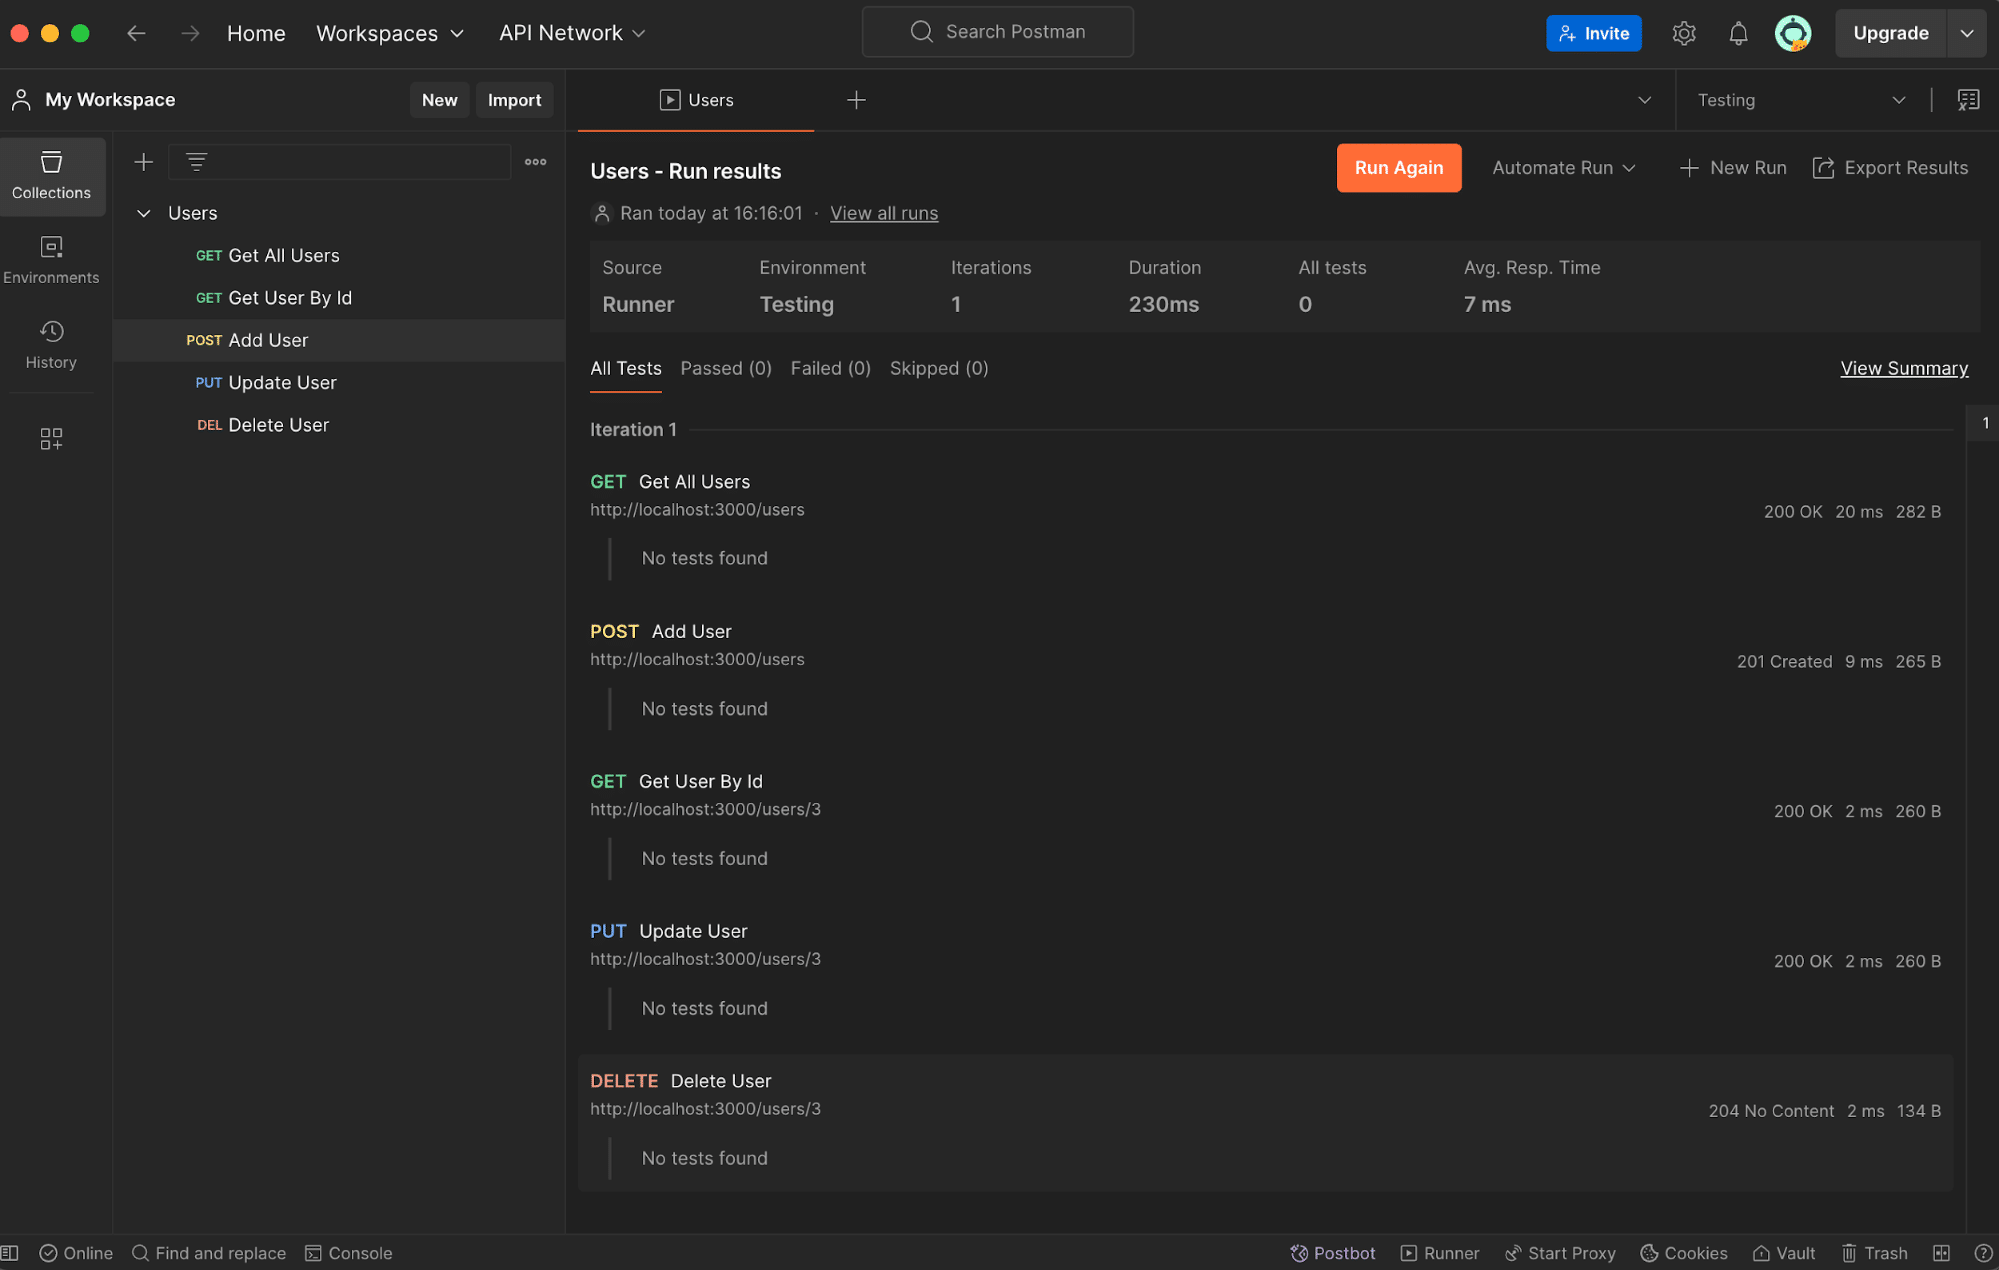
After running the collection, the “Run Results” tab will open, providing a high-level overview of the results.
In the results tab, drill into a request to see the exact response. For example, the GET request returns the newly created user.
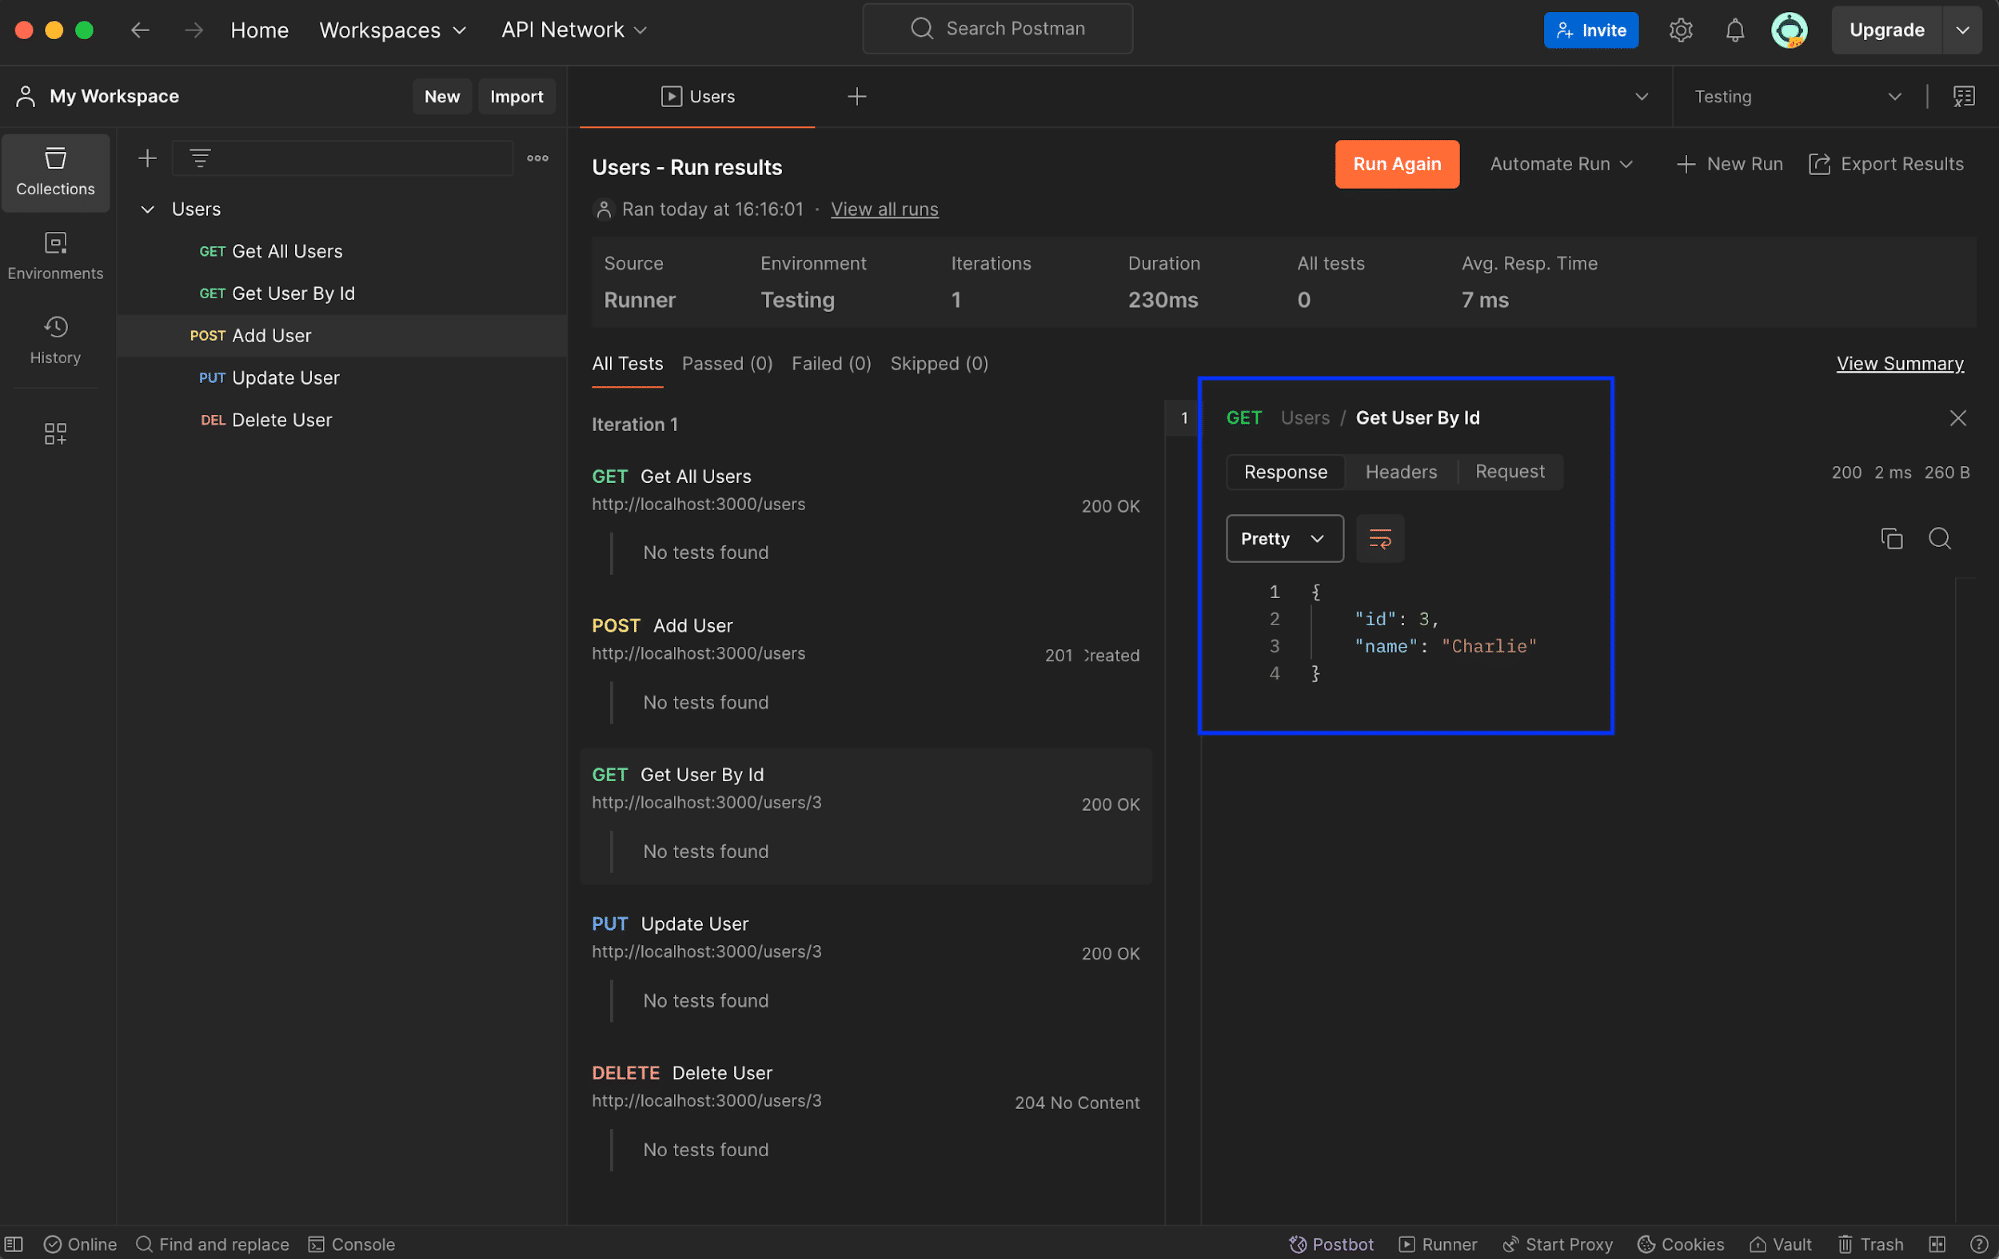
If you click “Run Again” and check the GET request’s response, you’ll notice the user’s ID has increased due to the script set up in the earlier POST request.

Beyond Functionality: Ensuring Your APIs are Securely Built
Using Postman for API testing can ensure that your APIs function correctly. However, are you sure they’re secure against threats? Can you ensure they’re safeguarded from security vulnerabilities that might expose sensitive data or disrupt your services?
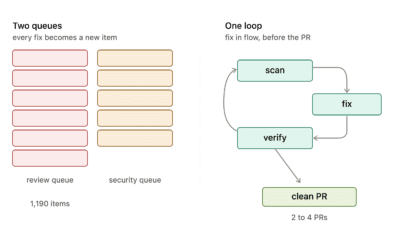
Traditional testing strategies often overlook critical security weaknesses. This is where StackHawk excels. As a Dynamic Application Security Testing (DAST) solution, StackHawk is purpose-built to identify and help remediate API vulnerabilities. It seamlessly integrates within your CI/CD pipeline to help automate API tests as part of a holistic API testing strategy, continuously assessing your APIs for potential risks.
Achieve Comprehensive API Security with Automated Discovery
In addition to automated testing, StackHawk provides a powerful API discovery engine and API oversight, features that allow you to see your complete API attack surface. This functionality automatically identifies and documents all your API endpoints, including those that might be inadvertently missed. This comprehensive mapping of your API development process landscape ensures that every API endpoint undergoes rigorous security assessment, leaving no gaps in your security posture. Sign up today to try Stackhawk for yourself to move beyond functional API testing and into the next stage of API security testing.