Security as Documentation
Every developer knows the importance of good documentation regardless of whether you’re working on your first ‘Hello World’ program or a complex corporate monolith. Effective documentation can make or break the experience you have when interacting with someone else’s codebase. And, if you’re being honest, it’s likely come in handy when dusting off the cobwebs to one of the many projects you sent to live on the island of misfit toys over the years.
Beyond the typical value drivers like adoption and maintainability, good documentation, specifically for APIs, is critical to your application’s security posture. This is especially relevant today given modern web development’s heavy reliance on SPAs + APIs. If you were to only test the frontend JavaScript, your visibility into the vulnerabilities that haunt your application would be sorely lacking. Additionally, if your documentation is only half baked or incomplete, you face the same issue.
In addition to greater visibility, good API documentation increases the efficacy associated with automated security testing. Rather than relying on the spider to “discover” your API, pre-seeding the scanner with your OpenAPI spec takes the guesswork out of the process. It also leads to better test results since the scanner can infer how to communicate with your API based on defined inputs.

Good Code Documents Itself
But what if you haven’t yet added an OpenAPI spec to your project? Don’t allow a lack of documentation to keep you from shipping secure code. OpenAPI is widely adopted, and as such there are a lot of tools available to help you get started. And given how easy it is to auto-generate Swagger Docs, not having documentation is no longer an excuse.
SmartBear has free online editor that can be used immediately to start building a OpenAPI file that will work with StackHawk: https://swagger.io/tools/swagger-editor/
For new projects, the industry recommended approach is to create an OpenAPI spec file and employ OpenAPI code-generators to stub out the endpoints for the desired server frameworks.
For existing projects, you may want to explore framework specific utilities:
Auto-Generating Swagger Docs for Django Projects
Let’s walk through adding the drf-yasg – Yet another Swagger generator to our hawkling-api codebase.
Clone the Repository
git clone https://github.com/kaakaww/hawkling-api.git
Install drf-yasg
pip install drf-yasg
Add drf-yasg as an installed app in settings.py
INSTALLED_APPS = [
    'django.contrib.admin',
    'django.contrib.auth',
    'django.contrib.contenttypes',
    'django.contrib.sessions',
    'django.contrib.messages',
    'django.contrib.staticfiles',
    'rest_framework',
    'drf_yasg',
]
In urls.py import re_path from django.urls and add the following under from rest_framework import permissions
from rest_framework import permissions

#---ADD---
from drf_yasg.views import get_schema_view
from drf_yasg import openapi

schema_view = get_schema_view(
    openapi.Info(
        title="Hawkling API",
        default_version='v1',
        description="A minimal API",
    ),
    public=True,
    permission_classes=(permissions.AllowAny,),
)
Include the following paths in urls.py
re_path(r'^swagger(?P<format>\\.json|\\.yaml)$', schema_view.without_ui(cache_timeout=0), name='schema-json'),
re_path(r'^swagger/$', schema_view.with_ui('swagger', cache_timeout=0), name='schema-swagger-ui'),
re_path(r'^redoc/$', schema_view.with_ui('redoc', cache_timeout=0), name='schema-redoc'),
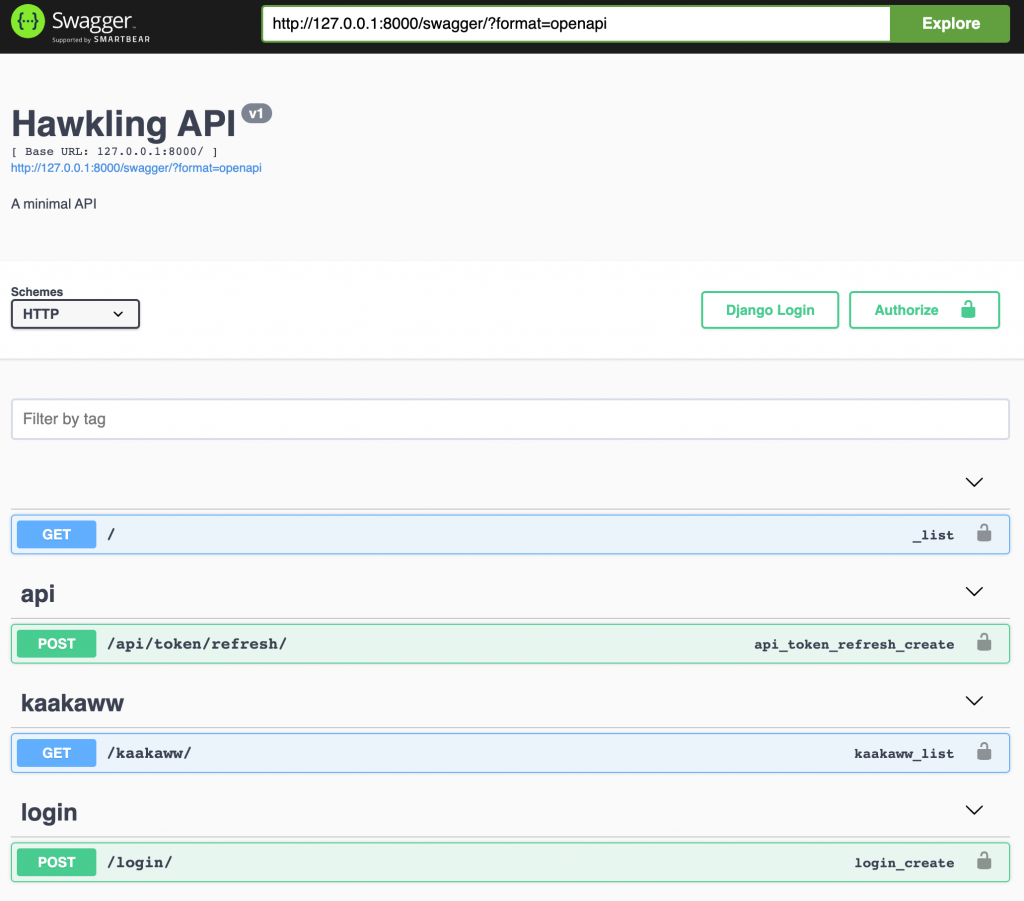
And that’s it! If you visit localhost:8000/swagger/ in your browser you should see existing routes have been documented and any new route you add to the API will be automatically included in the documentation.

Configure and Run HawkScan
We’ll now configure our stackhawk.yml file similarly to how we did in Part 3 of Security Testing Authenticated Routes series. The only difference is we’ll now add a section for the scanner to ingest the newly created OpenAPI specification.
We have a couple options for seeding HawkScan with our OpenAPI spec.
Option 1: Specify the relative path to either the .json or .yaml file in your project directory.
Option 2: Specify the relative path to pull the file from the target host.
Option 3: Define your API inline or directly within the stackhawk.yml file itself. This is very useful for initial testing or limiting the scope of the API you want to test.
For this example we’ll chose the Option 2 and add app.api: /swagger.json to our config file.
app:
    applicationId: xxXXXXXX-xXXX-xxXX-XXxX-xXXxxXXXXxXX
    env: Development
    host: http://localhost:8000
		api: /swagger.json. #<--- Add API Config Here
    authentication:
      loggedInIndicator: ".*message.*"
      loggedOutIndicator: ".*detail.*"
      usernamePassword:
        type: JSON
        loginPath: /login/
        usernameField: username
        passwordField: password
        scanUsername: admin
        scanPassword: adminpassword
      tokenExtraction:
        type: TOKEN_PATH
        value: "access"
      tokenAuthorization:
        type: HEADER
        value: Authorization
        tokenType: Bearer
      testPath:
        path: /kaakaww/
        success: ".*200.*"
Now run HawkScan as before
docker run --rm -v $(pwd):/hawk:rw -it \
  -e API_KEY=hawk.xxxxxxxxxxxxxxxxxxxx.xxxxxxxxxxxxxxxxxxxx \
  stackhawk/hawkscan:latest

Notes
There is a reason that documentation is stressed so heavily during the development process. It has real tangible value both for humans and machines when interacting with your applications. Additionally, auto-generators like drf-yasg help to take the heavy lifting out of the processes of creating and maintaining documentation, making it easier to automate critical business processes like security testing. Lastly, utilizing Swagger Docs in your security automation delivers test results with greater visibility and a higher degree of efficacy, ensuring confidence in the posture of your code as it’s pushed to production.


